Thistles: The Eclectic Family of Artichokes, Cardoons and Burdock
Winnie the Pooh's friend Eeyore is the only thistle aficionado I know of. But people around the world love at least one of thistle's many cousins. The Egyptians, Greeks and Romans enjoyed the fleshy stems of cardoons and they remain a favourite throughout the Mediterranean. The Scottish continue to revere thistle flowers, but edible cardoons never became accepted with the British or their colonies. (They grow so vigorously yet are so rarely used in Australia that they have become a noxious weed.)
The Arabs refined the cardoon's flower bud in the fifteenth century to share with the world as artichokes. By the sixteenth century they were standard fare in royal households across Europe. Soon these buttery globes were being savoured in Peru, Argentina, Morocco and China. It was not until the nineteenth century, with the introduction of the larger and easier-to-eat Green Globe variety, that they became acceptable to North American sensibilities.
Burdock is another form of thistle, but one that is grown for its root. For most of its long history, the wild form has been used around the world for numerous medicinal purposes. These include solving digestive problems, clearing skin conditions, treating colds and flu, relieving the symptoms of arthritis, passing kidney stones, fighting cancer and, in more recent years, reducing the risk of heart disease. All forms of thistle share these healing characteristics and are good sources of fibre, folate, vitamins C and K, antioxidants and phytonutrients. Through the centuries, the wild form of burdock served so well that there is little record of plant breeding.

Artichokes
This vegetable is neither easy to grow nor easy to prepare but its continued popularity is proof of the great satisfaction this immature flower bud provides. Since artichokes do not tolerate freezing, they require some special attention when grown in Canada. In the 1990s I was a market gardener for restaurant and hotel chefs. They often lamented that they could not source artichokes during the non-R months. I determined there had to be a way to take advantage of our cool summers to produce artichokes during the months that California growers could not.
Since artichokes only start producing buds after they have experienced a cool period—a winter, for instance—I set out to develop a way to trick the plants. I planted heritage Green Globe seeds (the only variety available) in December and grew them in a warm greenhouse. By mid-April they were in 2-gallon pots and ready to be vernalized. I moved them outside but covered or brought them in when temperatures were forecasted to fall below minus-2° C. By mid-May they could be safely transplanted into their bed. I cut off the large lead bud to encourage the tender smaller side buds that my chefs loved. Unfortunately for me, however, California growers had by then learned how to trick their plants into producing during the summer months.
Now there is a new Imperial Star variety that only requires ten days of chilling below 10° C. These can be started in late February. So it is much easier to vernalize these plants to produce buds in the first year. Since artichoke seeds have naturally poor germination and many off-types to discard, determine the number of plants you'd like to grow and start with at least double that number of seeds. Whatever variety you choose, it should have grown to at least its fourth true-leaf stage before initiating the chilling process.
An alternative process is to grow the more flavourful Green Globe or its new spineless Emerald version the first year (with no buds forming). Then dig up the roots and store them in pots kept just above freezing through the winter. Replant the following May for a more productive crop. This process can be repeated for three or more years. The advantage of locally grown artichokes is that you can pick them while all the petals are still tightly closed. Being more tender, they require about half the cooking time and have edible chokes.
Whichever way you start them, plant in well composted soil. Give your plants plenty of room in rows six feet apart with four feet between plants. Deeply loosen the soil around each plant by jiggling a digging fork. Then keep the soil cool by covering the soil a foot from each plant with mulch to prevent devernalization. Artichokes require more water than most plants so make sure they receive more than one inch of water every week.
Harvest the buds before the petals start to open. You can enjoy them right away or refrigerate them in a plastic bag for two to three weeks. After all this effort, I prefer the most simple preparation. Drop the whole buds into lightly salted boiling water. Simmer until one of the central petals can be plucked out (about 20 to 30 minutes). Slowly and ceremoniously dip each petal into a buttery hollandaise or mustardy mayonnaise and scrape off the luscious flesh with your teeth.
Don't spoil the experience with utensils. And don't spoil a good wine while eating an artichoke. (Artichokes have taste inhibitors which make everything taste sweeter.) A bitter beer will be okay. If all of this seems like too much effort, immature sunflower buds have a wonderfully nutty flavour that is almost as good.
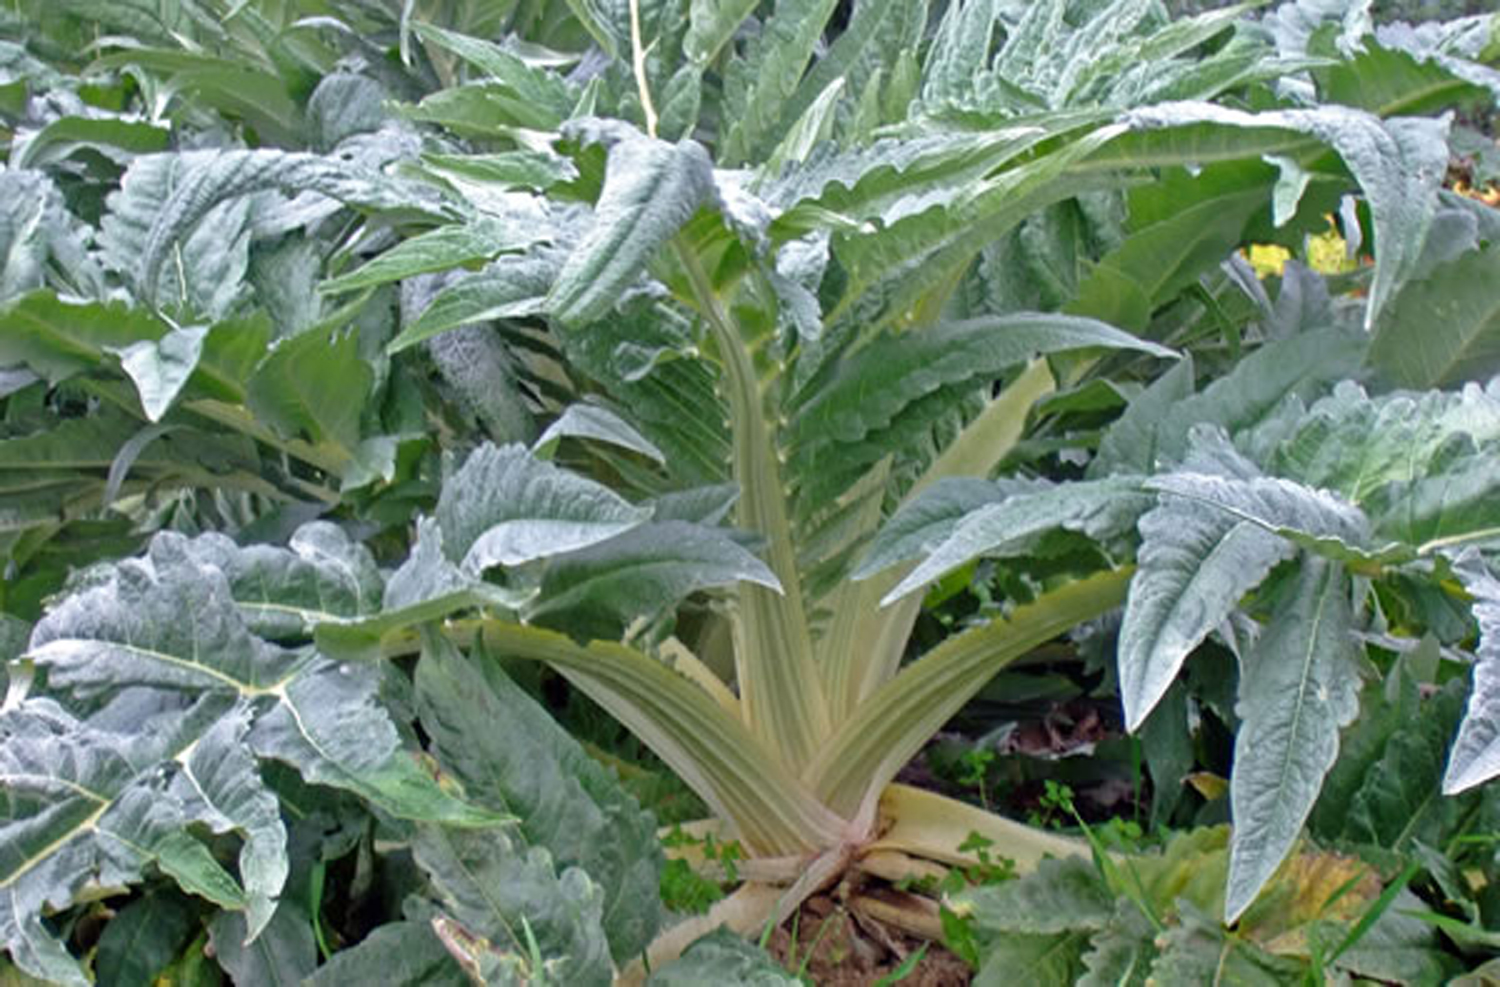
Cardoons
Cardoons are basically the same plant as artichokes. But with no buds to be concerned with, there is no vernalization to deal with. Start them in late March. Plant them in good soil in rows two feet apart with the plants two feet apart. Or put a few of these stunning plants in your flower garden. (They are so beautiful you might find the seeds in the flower section of some catalogues.) If they flower, you will feel very Scottish. The seed tufts can be used in place of rennet for making vegetarian and kosher cheeses.
In late September you should blanch each plant for about thirty days to reduce bitterness and tenderize the stalks: Cut off outer stalks lying near the ground. Have an assistant hold all of the remaining stalks together while you wrap them with about three layers of brown paper or burlap to keep out most of the light. Tie with a couple of lengths of string. Before a hard freeze, cut off the leaves and cut the stems at soil level. Leave the paper or burlap on and stack into a plastic bag. These will remain fresh for about two months in the refrigerator.
To prepare the cardoons, pull apart the stalk as you would a celery stalk. Trim off any sharp spikes and bitter leaves. Cut into 4-inch pieces. If there are any dental-floss-like strings remaining after the blanching, pull these out. Immediately brush the stalks with lemon juice to prevent browning. Poach in lightly salted water until tender (about 20 to 30 minutes).
They can be stored in the refrigerator for a week. The classic use of these cooked cardoons is with bagna cauda, a dip of melted butter flavoured with chopped garlic and anchovies and served in a fondue bowl. Traditionally, simmered or roasted vegetables such a cardoon, fennel, onion, pepper, cauliflower, carrot and broccoli are dipped into the bagna cauda. Another way of serving cardoons is to sauté some mushrooms and cipollini onions and combine them with the poached cardoons.
If growing both artichokes and cardoons is too much of a challenge, you could use the artichoke stalks as a substitute.
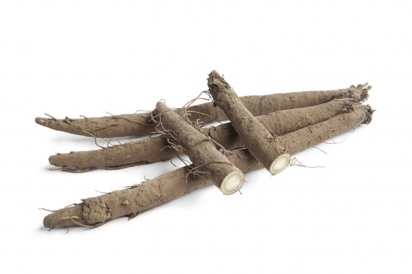
Burdock
Burdock has mini thistle flowers just to remind you of its heritage. Wild plants usually taste fine but they are often too difficult to dig out without breaking. The Japanese, who prefer burdock to carrots, have developed a thicker and less brittle variety called Takinogawa.
Burdock is exceptionally easy to grow. Just put the seeds in the ground in early June and wait until October to harvest. The roots can be stored in a plastic bag in the fridge until spring.
The challenge is to come up with a practical way to harvest these roots, which typically go down over two feet. I determined that planting them in a single row about two inches apart is best. Prior to harvest I cut off the leaves and then dig a 12-inch-deep trench on one side of the row of burdock. A little jiggling with a digging fork at the bottom of the trench loosens the deep roots. Then with a flat spade on the other side of the plants, push straight down and gently tip the crumbly soil into the trench. The top half of the root will be exposed to make lifting easy.
While I was coming up with a method for growing Canadian Globe artichokes, I provided my chefs with a much-easier-to-prepare and always-in-season substitute, the recipe for which follows. They discovered that burdock does indeed have the same enchanting flavour as artichoke hearts. It does, however, lack the panache of the real thing.
Baked Burdock and Colourful Vegetables
By David Cohlmeyer
Makes 8 servings
Grey chunks of burdock are the perfect foil for the colourful chunks of other roots, as well as vegetables such as fennel. Prepare this healthful and delicious dish up to a day or two ahead and serve with just about any main course.
- 8 cups assorted vegetables such as burdock, orange carrots, red beets, yellow potatoes, celery root and fennel bulb
- 2 tbsp. extra virgin olive oil
- Sea salt, to taste
- Freshly ground black pepper, to taste
- 1/4 cup chopped flat-leaf parsley
Peel all of the vegetables except the burdock and fennel. Cut them into 3/4-inch chunks. In a large bowl, toss them with the oil and then with the salt and pepper. Spread the vegetables in a single layer on baking sheets, keeping the varieties separated on the baking sheets. Bake in a 325° F oven, gently tossing the vegetables every 15 minutes until softened and lightly browned, about 45 minutes. If any of the vegetables are getting too browned or shrivelled, remove them ahead of the others. Serve immediately or allow the vegetables to cool down, then refrigerate. Reheat just prior to serving. Garnish with the parsley.