Arugula and Kin
It's human nature. After a long winter we immediately want fresh food from the garden. There are perennials (such as asparagus) and wild plants (dandelions, fiddleheads, and wild leeks). But there are also fast-growing annuals that can be ready to harvest in less than thirty cool days. These actually benefit from being planted early because they become unappealingly biting after the days turn hot
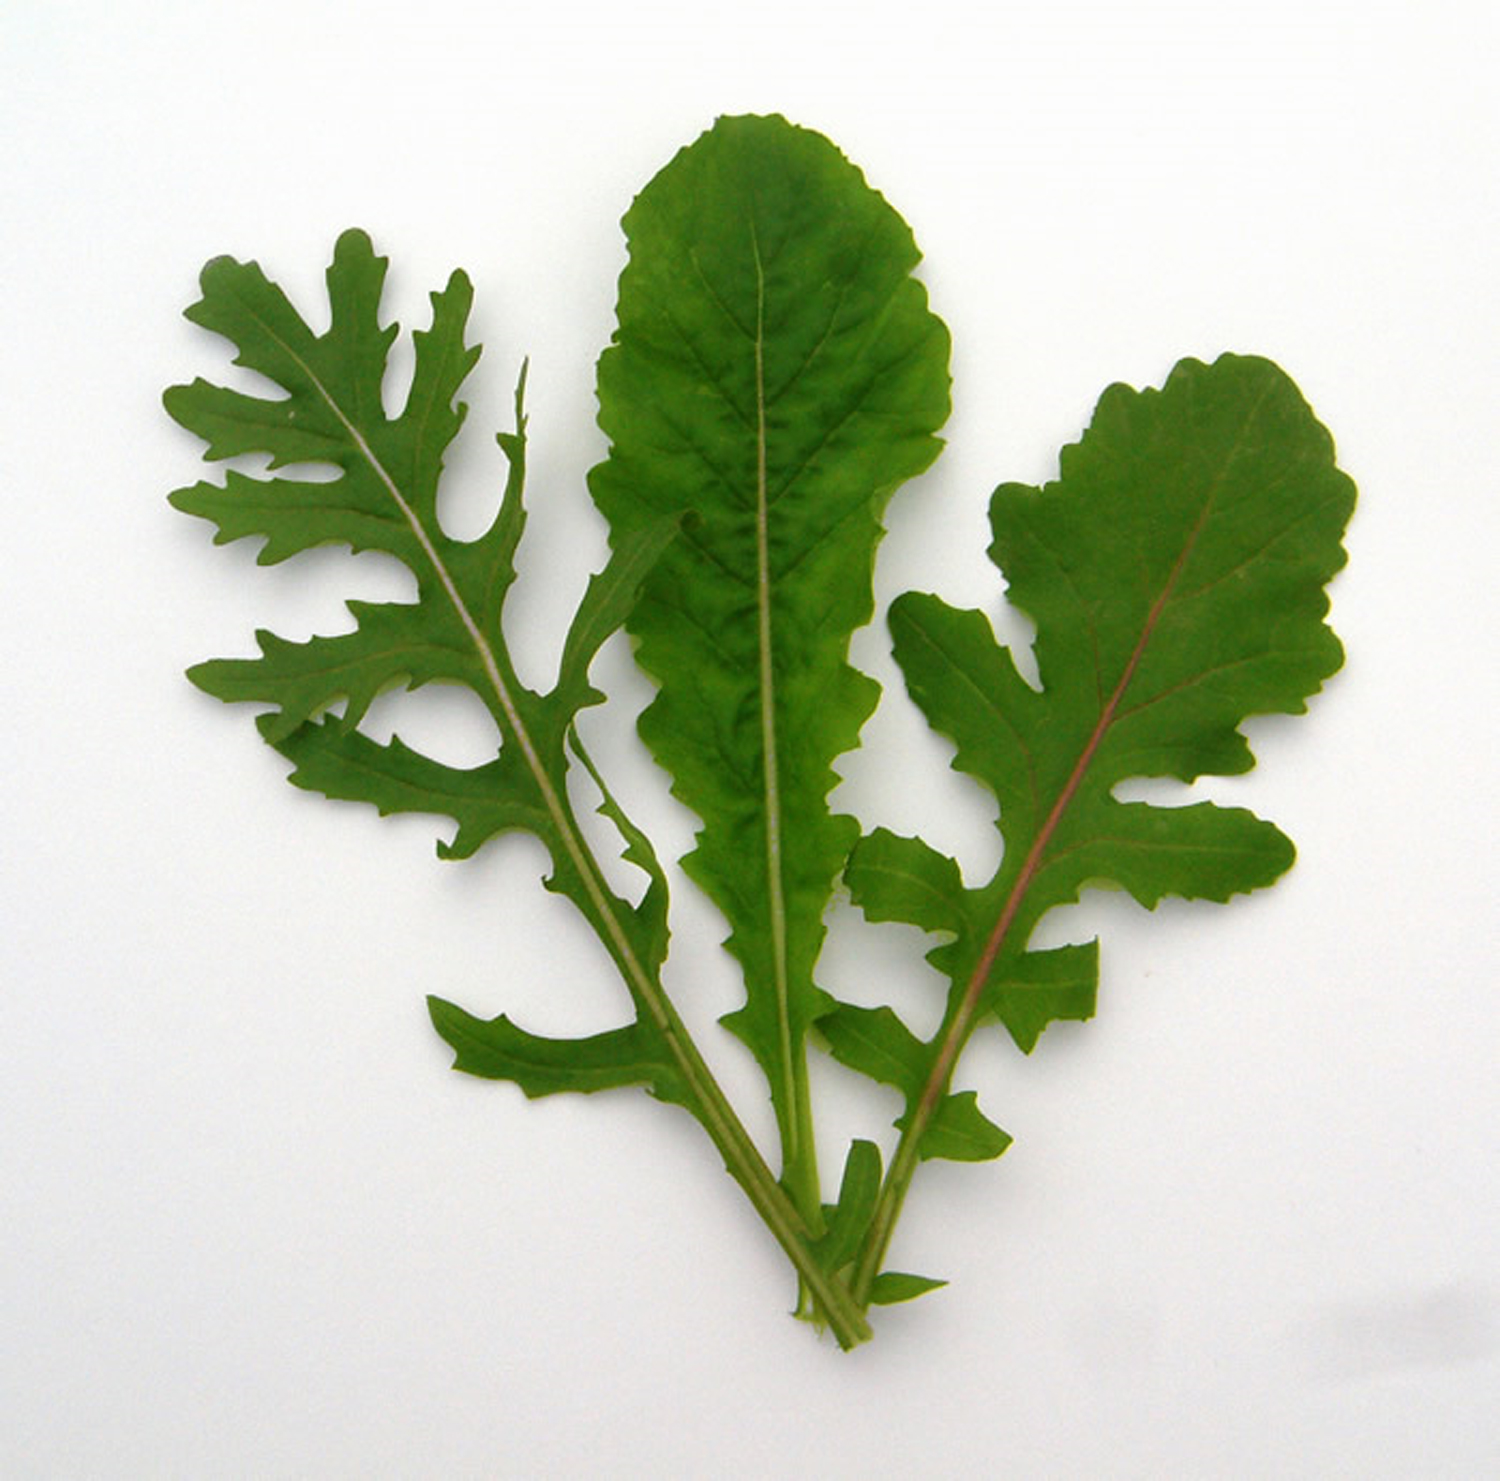
Arugula is the go-to green these days. Its pungency takes a moment to arrive and it dissipates just as quickly. And then its nutty aroma remains.
Cress is less aromatic. Its pungency comes and goes quickly. But it grows the fastest.
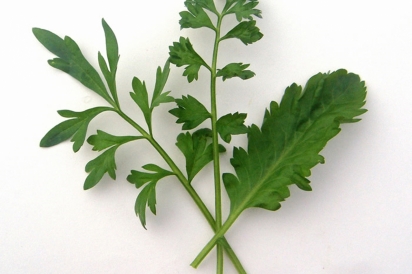
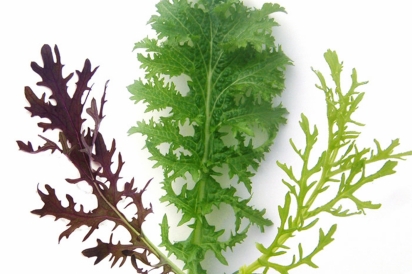
Mustard comes in many beautiful shapes and colours. Its pungency takes time to hit but then lasts awhile. The shapes, pungencies and aromas vary between varieties.
These are all members of the Brassicacae (cabbage) family, but each has its own look and flavour. Gardeners and chefs can handle each one in the same way.
Historical Record
All of these crops predate the historical record, so botanists assume they originated where the most diversity is still found. Arugula likely originated in North Africa and then quickly spread around the Mediterranean. Eruca was a popular Roman salad ingredient, often combined with milder lettuce to be served with oil and vinegar. The seeds were also used to flavour oils.
Through the centuries arugula's popularity spread through France as roquette, the English-speaking world as rocket, and Italy as rucola. Being a reputed aphrodisiac might have boosted its popularity, but this factoid possibly led to its disappearance from North American markets for over a century. It started to regain popularity—and a new name—in the early 1960s after New York Times food editor Craig Claiborne started touting a special leafy green available in the city's Italian markets. He spelled it "arugula" and the name stuck in North America.
There are records of cresses (Lepidium) being enjoyed with oil and vinegar on Persian tables even prior to the development of wheat and bread. Versions of upland cress, watercress, and peppergrass soon spread east into India and west to Greece, Rome, and Spain. Cresses are now enjoyed in cuisines all over the world.
Mustards have been used in the Far East since prehistoric times. The earliest ones were selections of plants collected from the wild. The "brown-seeded" leafy greens we most often enjoy today (brassica juncea var. crispifolia) are from a chance cross between a turnip and a condiment-mustard plant. Today we know these as mizuna, red giant, green wave, scarlet frills, golden frills, and many more.
Quality Growing
Arugulas, cresses, and mustards can be planted in the garden as soon as the soil is dry enough to not require boots (late April or early May). Be prepared to start a second crop two weeks after the first, and maybe a third about two weeks later. Varieties to consider are:
Arugulas
Common arugula (rocket) has stronger flavours and aromas than the newer types.
Astro looks similar to the standard arugula, but it is milder, tenderer, and is reputed to be more heat tolerant. This is the bland variety now found on most grocery shelves.
Sylvetta are new breeds of "wild" arugula. They are shorter, with very deeply lobed leaves, and more pungency than standard arugula.
Cresses
Peppergrass (curly cress) grows very quickly and looks beautiful on sandwiches or in salads.
Watercress needs to grow in or near water. Recommended only for experienced gardeners.
Upland Cress is suitable for regular garden conditions. It grows slower than peppergrass, but has a longer harvest window.
Mustards
Red Mizuna has dandelion-like pointed purple leaves and a gentle mustard bite and aroma.
Golden Frills has gorgeous deeply serrated leaves with a pale green color and a stronger mustard bite and aroma.
Green Wave has green heavily frilled leaves. In hot weather it can become intensely pungent and aromatic. But this can be tamed by cooking.
Mark a shallow row (about 5 mm deep) and then dribble the seeds in about 1 cm apart. Push back the soil to cover the seeds. Rows can be about 15 cm apart. It is easy to cultivate out any weeds between the rows.
In about a week, tiny green shoots start to appear. To speed the growth, you can insert some hoops over your plants and then cover with clear plastic or row cover. They will survive temperatures down to -4º C with no protection. Just remember that the tiny plants suffer from temperatures over 30º C. Under the cover this can happen very quickly on a bright sunny day, so be prepared to remove the cover from your tender young plants.
Around May 15, the prime brassica pest suddenly appears. If your garden is in an urban area you might be lucky and they'll fail to find your crop. But if your garden is in a rural area, definitely prepare for pinhead-sized shiny black flea beetles. They chew tiny round holes in the leaves. The only effective solution is setting out hoops to be covered with a row cover that is carefully sealed into the soil around the crop. Lightweight spun-bond polypropylene lets in the sunlight, air, and rain but keeps out the pests. It rips easily, however. ProtekNet costs much more but it keeps the crop cooler and will last for many years.
For the best quality, keep the soil damp. The plants will appreciate one inch of rain or irrigation water every week. Setting out a cup to measure this is useful.
In about three weeks, the leaves should be around the size of your palm and ready to harvest. Uncover the leaves and quickly pinch or cut everything at the ideal size. Then quickly re-cover the plants before any flea beetles find the uncovered leaves. Promptly—before the leaves begin to wilt—rinse in cold water and spin dry. Use as many freshly harvested leaves as you can. Extra leaves can be stored in a plastic bag in the refrigerator for about a week.
In a few days there will be more leaves ready to harvest. If the leaves become too large (larger than your palm and outstretched fingers), they may have become unpleasantly acrid. Compost these. Perhaps tender new ones will be ready to harvest in a few more days. Otherwise, wait for the next planting. Pull out any plants past their prime to make room for another crop.
In anticipation of cool fall days you can start more successions in mid-August. If you need to grow successions through the summer, it is best to do this in a cooler spot with afternoon shade.
Uses for arugula and its kin
Of course, the very best use of these tender spring greens is fresh in salads. If they are too pungent, you can subdue this by combining them with lettuce leaves. The spicy leaves are a perfect addition to sandwiches, wraps, and burgers. Also keep them in mind for sprinkling onto soups or into scrambled eggs. In Brazil they accompany these spicy fresh greens with mozzarella and moistened sundried tomatoes. In Egypt they are often served as an accompaniment to stewed fava beans (ful medames).
If your leaves are too biting to be enjoyed raw, you can tame them by cooking. My favourite method is to sweat a bit of minced garlic in a couple of tablespoons of extra virgin olive oil and then stir in some chopped greens and a little water. Cover and steam them only until just wilted. Then toss in a pinch of salt and a squirt of lemon juice. Another use is to add coarsely chopped greens along with your drained, almost al dente pasta and a bit of the pasta cooking water into your sauce as you finish cooking your pasta dish. You can also substitute them in your favourite spinach recipes.
Arugula Pesto
Makes 4 servings
You do not need to wait until summer basil season to savour the joy of pesto. This is another great pesto to toss with pasta. You can also use it as a spread on toast, over roasted potatoes, as the sauce on pizza, to garnish grilled fish, or as an amazing vegetable dip.
While you are cleaning and drying the arugula, start the walnuts and garlic roasting.
- 1/2 cup walnut halves
- 4 cloves garlic, peeled
- 3 cups arugula, cress or mustard, or a combination, rinsed and dried
- Finely grated zest of 1/2 lemon
- Juice of 1/2 lemon
- 1/2 cup grated Parmigiano-Reggiano cheese
- 1/4 tsp sea salt
- 3/4 cup (approx) extra virgin olive oil
Put the walnuts and garlic on a small baking sheet. Bake in a preheated 350º F toaster oven until fragrant and lightly browned, about 5 minutes. (Alternately, toast the walnuts and garlic in a dry frying pan over medium heat until fragrant and lightly browned, about 5 minutes, taking care not to burn the nuts.) Transfer immediately to a plate to cool.
In the bowl (or jar) of a food processor or heavy-duty blender, process (or blend) the walnuts, garlic and arugula until coarsely chopped. Process (or blend) in the lemon zest, lemon juice, cheese and salt. Run the processor (or blender) as you slowly drizzle in the oil until the mixture is thickened, somewhat like mayonnaise. Use the pesto immediately or promptly transfer it into a jar and refrigerate, covered, for up to one week.